
Markers
Types of Markers
The markers are the analogs of the marks drawn by a carpenter on its piece of wood. They are are used as reference for further construction. There are several types of markers :
hooks : the markers are points
lines
boxes ( useful to specify parallepedical coordinates)
cylboxes ( useful to specify cylindrical coordinates)
An object may carry many markers, many hooks, lines or boxes, but exactly one of each type is selected and active. When you add a marker, it is automatically selected. For instance
c.add_axis("myFirstAxis",line(origin,origin+X))
c.add_axis("mySecondAxis",line(origin,origin+X+Y))
will add 2 axis markers to the object, the last added axis being the selected one. We can refer to the markers as follow:
c.axis() # the selected axis
c.axis.myFirstAxis
c.axis("myFirstAxis") # same output as the previous line
To change the selected axis
c.select_axis("myFirstAxis")
Similarly, for hooks and boxes, the following instructions make sense:
c.box() # the selected box by default
c.box("myBoxName")
c.dicobox.myBoxName #shorter to write, same as the previous line
c.select_box("myBoxName")
c.print_boxes()

c.cylbox()
c.cylbox("myCylboxName")
c.dicocylbox.myCylboxName
c.select_cylbox("myCylboxName")
c.print_cylboxes()

c.hook()
c.hook("hookName")
c.dicohook.hookName
c.select_hook("hookName")
c.print_hooks()

c.axis()
c.axis("axisname")
c.dicoaxis.axisname
c.select_axis("axisname")
c.print_axis()
Hooks and Lines
We have already encountered hooks and lines markers and we saw that they are used to move an object geometrically in the functions hooked_on, self_grotate, etc …
Boxes
A common way to specify the positions of the objects in a workshop is to draw marks on the objects from which we make measurements. For instance, we draw a circle, and we drill our object 2 centimeters above the circle.
In pycao, we can attach boxes to our objects. The purpose of boxes is to allow various ways to make measurements. The boxes are not shown on the 3D-view. They are just marks useful for our constructions.
We can attach any number of boxes to an object. The boxes may have different form, parallelipedic or cylindric for instance. The first one is useful for measurements in parallelipedic coordinates, the second one for measurements in cylindrical coordinates.
In the real life there are several ways to make a measurement with the same marks on our piece of wood. For instance, if we have drawn a square, sometimes we measure 2 centimeters from the left side of the square, or from the right side of the square. Sometimes, we use no reference to meters or centimeters, yet we use our marks, for instance when we we consider the point in the middle of the square. In pycao, we may specify a letter “a”, “n” or “p” for some parameters to indicate how we want to make measurements with our boxes.
To sum up, in Pycao, there is a concept of box. A box is like some sketch/contour of a 3D-object drawn on your piece that we can use to make several type of measurements.
Usual ( parallelipedic ) boxes
Points in Boxes
In general, a box has three coordinates and the instruction
c.point(x,y,z)
denotes the points of coordinates (x,y,z) with respect to the selected box of the object. Options are possible, and here are somme possibilities.
c.point(x,y,z."aaa")
c.point(x,y,z."nap")
c.point(x,y,z."ppp")
c.point(x,y,z."pna")
c.point(x,y,z) # an alias for c.point(x,y,z,"ppp")
Let us explain the previous notation. When we make a measurement of a piece of wood on the desk, sometimes we start from the left side (“5 centimeters from the left side of the desk”) sometimes from the right side (“5 centimeters from the right side”) sometimes we describe the points in terms of proportionality (“in the middle between the left side and the right side”). These three possibility of measurements are possible inside a box with pycao. They correspond to the letters “a” (for absolute), “n” (for negative) and “p” (for proportional) in the strings above. And you can mix the units of measurements on each axis. For instance, if you choose “anp”, ie absolute for x, negative for y and proportional for z, a point with coordinate p=c.point(.5,.5,.5,”anp”) will be inside the box .5 units from the face with minimal x, .5 units from the face with maximal y, and in the middle of the the two planes with constant z.
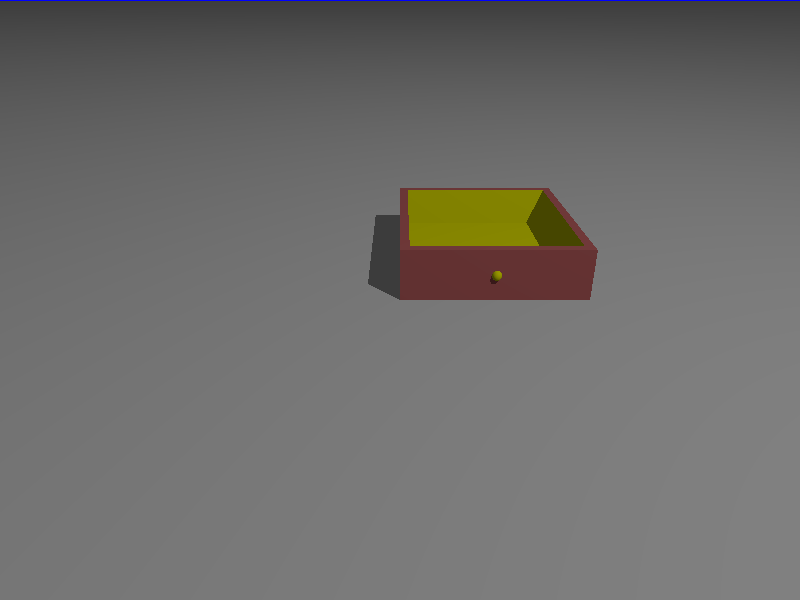
To illustrate these notations, we draw a little drawer.
g=plane(Z,origin).colored("Grey")
boardThickness=.02
drawer=Cube(.4,.4,.1).colored("Brown")
# We define two points which are the opposite corners of the cube toCut
firstPoint=drawer.point(boardThickness,boardThickness,boardThickness,"aaa")
secondPoint=drawer.point(boardThickness,boardThickness,1.1,"nnp")
toCut=Cube(firstPoint,secondPoint).colored("Yellow")
drawer.amputed_by(toCut,keepTexture=False)
button=Sphere(drawer.point(.5,0,.5,"pap"),.01).colored("Yellow").glued_on(drawer)
Lines and planes in a box
We have seen the notations to describe a point relative to a box. Similarly, planes parallel to the facets and lines perpendicular to the facets of the box of a bounded objects are easily accessible to be used as intermediate steps of the construction.
Here is an example, where we draw infinite cylinders along the lines and an orange plane in coordinates relative to the box of the cube.
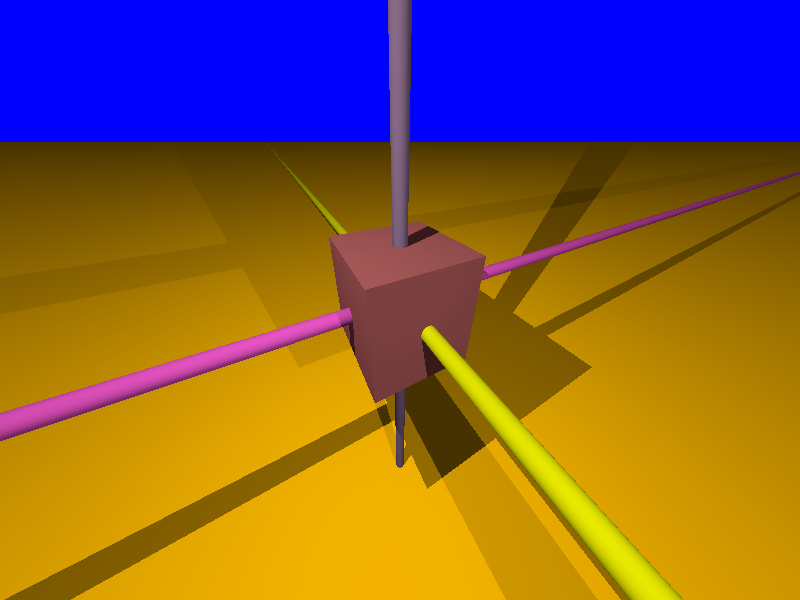
The instructions are:
c.boxline.(x,y,z,"rs") # r,s have value a,n or p according to the frame used.
c.boxplane((A,"r") #  with A=+/- X,Y or Z, r="a","n" or "p"
The coordinate that moves along the line is described as “None”.The example for the image above clarifies.
w=Cube(3,3,3).colored('Brown')
seg=w.boxline(None,0.5,0.5,"pp") # a line where y=.5,z=.5 are fixed in the middle of the cube and  x=None varies
cyl=ICylinder(seg,0.2).colored('SpicyPink')
seg2=w.boxline(0.5,None,0.5,"pp")
cyl2=ICylinder(seg2,0.2).colored('Yellow')
seg3=w.boxline(0.5,0.5,None,"pp")
cyl3=ICylinder(seg3,0.2).colored('Violet')
p=w.boxplane(Z,-2.5,"p").colored("Orange")
Adding new boxes
The code to define a box is
Framebox(listOfPpoints)
Here is an example of code to add boxes, and select one.
firstBox=FrameBox([origin,point(2,5,7), point(1,1,1)]) # The smallest box containing the points in the list
secondBox=FrameBox([origin, point(-1,1,1)]) #  An other box
myObject=point(0,0,0)
myObject.add_box("newbox",firstBox) # adds the box to the point and select it
print(myObject.box())
myObject.add_box("mySecondBox",secondBox)
print (myObject.box()) # returns the information on the second Box
myObject.print_boxes() #  the names of the boxes of a
myObject.select_box("newbox") # selects firstBox again
print (myObject.box())
The output is:
FrameBox:
Origin: Affine Point  [0.0,0.0,0.0]
Vectors:
Vector  [2.0,0.0,0.0]
Vector  [0.0,5.0,0.0]
Vector  [0.0,0.0,7.0]

FrameBox:
Origin: Affine Point  [-1.0,0.0,0.0]
Vectors:
Vector  [1.0,0.0,0.0]
Vector  [0.0,1.0,0.0]
Vector  [0.0,0.0,1.0]

['mySecondBox', 'newbox']
FrameBox:
Origin: Affine Point  [0.0,0.0,0.0]
Vectors:
Vector  [2.0,0.0,0.0]
Vector  [0.0,5.0,0.0]
Vector  [0.0,0.0,7.0]
Visualize the current box
We may visualize a box when we do not remember its size or its orientation. As an example, we draw two spheres s,t, and we show the box of the small sphere s.
Note that the colors of the facets correspond to the local axis of the object (XYZ corresponds to the colors RGB). A half cylinder indicates the positive direction on each coordinate. For instance, for the small sphere in the box, the local Y coordinates is in front of us, along the green cylinder. (Not seen on this picture: The side facing the negative coordinates is lighter than the facet which faces the positive coordinates)
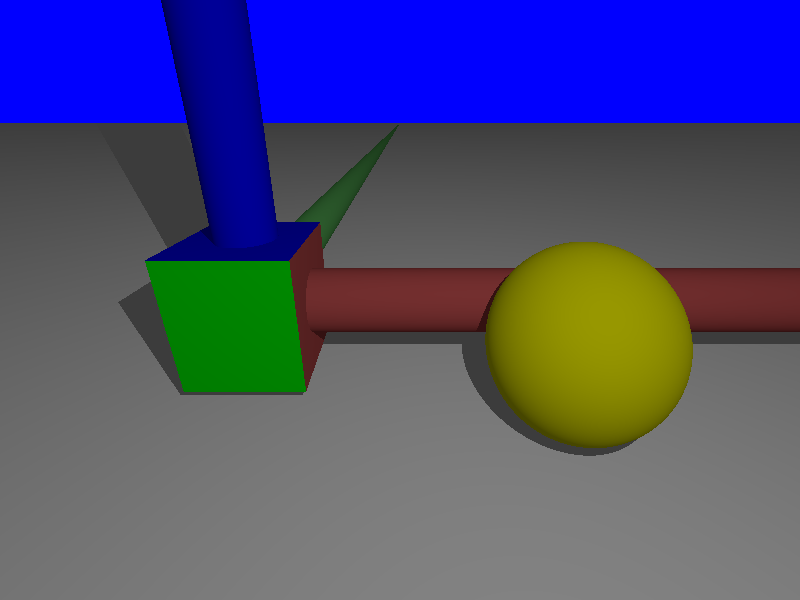
g=plane(Z,origin-Z)
g.colored("Grey")
s=Sphere(origin-2*X,.79)
t=Sphere(origin+2*X-Y,1)
t.colored("Yellow")
s.show_box()
Stacking boxes
Sometimes, we want to stack objects, which mean the we stack their implicit box. For instance, to put a cube above a cylinder, proceed as follows
g=plane(Z,origin).colored("Grey")
cyl=Cylinder(origin,origin+1.5*Z,.5).colored("Yellow")
myCube=Cube(1,1,1).colored("Brown").above(cyl)
Similarly, there are commands
object1.below(object2)
object1.on_left_of(object2)
object1.on_right_of(object2)
object1.in_front_of(object2)
object1.behind(object2)
These notations are useful only if you use the geometric conventions of Pycao : Z is vertical, Y is in front of you, and X on the right. So that the instructions are geomoetric if you look an object at position P from the position P-c*Y, with c>0.
Cylboxes (aka cylindrical boxes)
A cylbox is the contour of a cylinder of finite length. The cylinder has a marked point which is used as the origin of the measurement of the angles in cylindrical coordinates, ie the marked point has by definition an angle or a winding number equal to zero.
The formalism is quite similar to the formalism of parallelipedic boxes. We can add,select,… cylboxes. If the cylbox is vertical with a horizontal plane just below, a point with coordinate (r,w,s) with respect to that cylbox is at distance r from the axis, s from the horizontal plane, and the winding number is w. The numbers r,s can be interpreted with the letters “a,p,n” as for regular boxes. The winding number on the other hand, is always absolute.
If an object c carries a cylbox, the instruction
c.cylpoint(r,w,s)
c.cylpoint(r,w,s,"xy") # x,y in "anp"
will make sense and denote a point. A cylinder carries a cylbox by default (which is itself) at the time of construction.
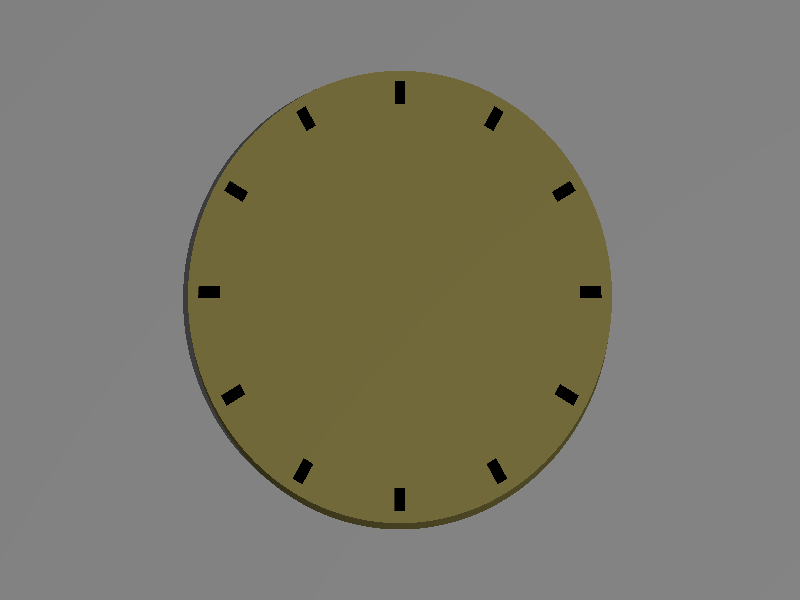
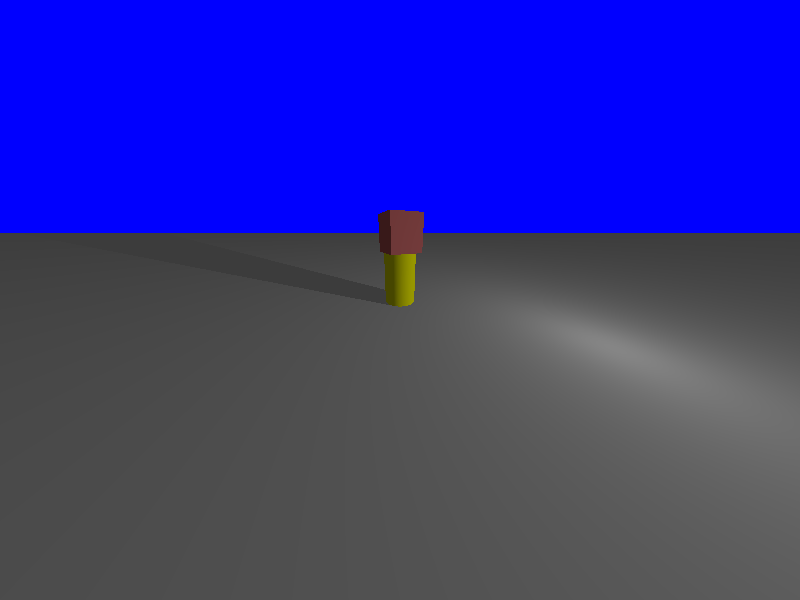
Let’s use these coordinates to build the above watch.
plane(Z,origin).colored("Gray")
cadran=Cylinder(origin,origin+.02*Z,.2).colored("Bronze")
mark=Cube(origin,origin+.02*X+.01*Y+.001*Z).colored("Blue")
mark.add_axis("vectorToCenter",mark.boxline(x=None,y=.5,z=.5))
mark.add_hook("pointToAttach",mark.point(.5,.5,0))
for i in range(13):
    p=cadran.cylpoint(r=.02,w=1./12*i,s=1,frame="np")
    q=cadran.cylpoint(r=0,w=i/12.,s=1)
    mark.clone().parallel_to(q-p).hooked_on(p).colored("Black")